Sweet! our tile is picked out..or is it?

I’ve learned a lot this week about picking out tile.  What you think would be a pretty simple thing to do as part of the kitchen renovation really isn’t.  Armed with pictures from Pinterest or Houzz, we have made our choice.

IMG_5664

I think the simple 3 X 6 tile with a gray grout will be simple yet striking…or we hope it will.  I guess once it’s up it will be too late, so, cross your fingers!

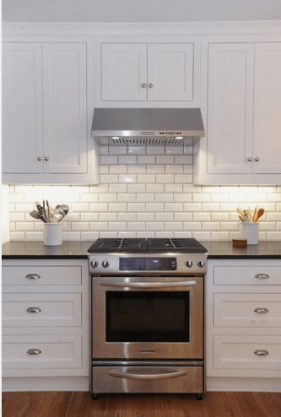
We are using a pot filler and will picture frame it in the backsplash.  Found this picture on Pinterest from http://www.goldenboysandme.com and it’s exactly what we are looking for.

IMG_2135.PNG

The difference in our backsplash will be that we opted to the the pot filler in the center versus to either side.  That way, I can fill the pots on all burners instead of just two. We found our pot filler in Amazon (of course…where else!)

IMG_2154

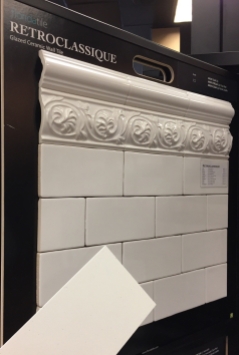
So, we need trim and bullnose and corner pieces as well.  My only choice in the Manhatten series is a beveled tile that has corner pieces.

IMG_2152

With that in mind, I am now rethinking and picking another subway tile that is glossy, 3 x 6, non-beveled, that has a bull-nose and corner pieces and available in 2 weeks or less. Whew.

By gosh, I think we got it!

This looks more a kitchen backsplash versus what you would find in a bathroom.

IMG_2166

We are using Ardex grout and caulk in Fresh Lily.  It looks greenish, but the sample, is more gray.

img_2167.png

Can’t wait to see it after it’s complete!  Really excited about these choices!


Walls go down, drywall must go up!

This is so exciting to see project taking shape.  This week the drywall started going up.  The walls have been void of drywall to put in new electrical and plumbing.  The pantry has also gotten built out and surprisingly isn’t as large as I thought it was going to be.


Looks like that drywall hanging is complete and just waiting for mud, tape and texture.


image.jpg

There’s a smell in the air and sounds of fans blowing!  That must mean it’s patching time!  And to think just a few weeks ago, there was a wall that divided.  And a lovely unpatched crack that we thought was repaired but wasn’t.

This is the pantry build out.  We never really had a pantry.  More like a closet…now this is a pantry!

image

Just a few more weeks now!  Moved the appliances delivery to November 22!


Decisions, decisions…

We are a few weeks off from the kitchen renovation being complete and a few decisions still need to be made.  Depending on the tile we choose, it may have to be ordered.  So let’s get to it.

With paint sample in hand, Sherwin-Williams Alpaca, I head to the Contract Mart.

IMG_2066

Of all the grays, why Alpaca?  We painted bedrooms in Requisite Gray and Alpaca is a light shade from that same family.  Plus it looks good with the cabinetry.  I asked the guy getting me the sample how do they come up with the names?  Do they sit in a room and say…hey that looks like an elephant or concrete or stone?  I suggest they have a garbage pail kid edition if they ever run of names…I really like that glooey gabe color, or virus iris..now that’s a color.

I only looked at 4 different boards of samples because we knew what we wanted.  A simple white subway tile with white cabinets.

IMG_2064

Even choosing a simple tile like we still have many choices.

Bevel or no bevel:


Matte or glossy:


3×6, 4×8, 4×10:


IMG_2096

White or gray grout:


Photos from Houzz

Last but not least, how to layout the pattern of tile:

Offset joint

img_2093.png

Offset 1/3

IMG_2094

Or straight set

img_2095.png

Photos by tiletramp.

We have a few days before we need to order anything, so, it’s something to think about!


Here Kitchy Kitchy

We have renovated 4 kitchens over the past years.  Some have been small upgrades like adding pendant lights, new appliances and granite….

to an entire gut job, like we are doing now.  You think it would get easier.  But, each renovation has had its up and downs.  I tend to remember the mishaps, so, I’m definitely more cautious and concerned than I have been in the past.

We are in the middle of our current renovation and it’s going well.  The process getting here didn’t (changing cabinet companies to Kitchen Concepts and contractors to Ed Mettier Construction) but now that it’s started its great!

This is the first time we have ever had a need for a drawing.  Most the time we have been confined to the existing walls.  Not this time! When someone says, Not a load bearing wall, I’m thinking get rid of it!  So we are, well, I’m not, but, our contractor is.

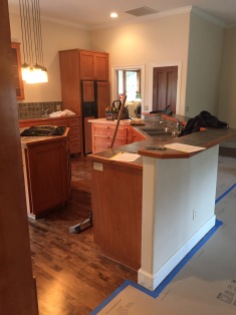
The kitchen isn’t a blank slate.  This is what it looked like before we moved in.

IMG_1282

We’ve made a couple changes like removing a soffit, changing out lights, removing carpet and adding hardwood to update it until we could have the full update started.

The plan is to remove the current kitchen and island.  We need to build the pantry out, remove the fireplace and last but not least removal of a wall.  Let the demolition begin.

Next the island and we won’t miss that!

And it’s gone..

IMG_5618

Did I mention we won’t be keeping the refridgerator? I will miss it….said no one ever!

See ya oven and microwave!

Boom!  Just like that, she gone!

image

And what about that wall?  You know, the non-load bearing wall..One side had a closet that I was using as a pantry..

And the other side was in our living room.

IMG_5156

No longer in need of your services wall…

image.jpg

I don’t think of it as losing a wall, more like gaining space.


Pool Time

When we bought the house, admittingly this part of the house was pretty impressive.  When I saw it online, it did peak our interest. I thought it was a joke listing at first and thought we may need to go look at this one.  I think at first I was more curious than interested.  I had never seen anything like this in a private home.


img_19981.png

I was able to find a couple images of the pool when it was on the market before we bought it.


And here are are a few images of when it’s been free of chemicals and left without care.

img_1997.pngimg_1995.png

Isn’t it sad? Even with the dark pool water and a critter making it’s home in the dark water, we were not deterred.  We figured it was still holding water so it just needed to be cleaned and the water balanced. We’ve done many renovations to houses, this shouldn’t be anymore difficult than those……

Not so fast, after thorough maintenance check there were a few things that we needed to fix.  Filters, motors and o-rings were in need of attention.  Plus, the auto filler, wasn’t filling the pool to the correct level.    Also, the heater was shot.  I found this out after inviting a group of teens out and not wanting to get in (me, that is…they were troopers).  It seemed odd how cold it was but, I just figured it was February and the heater was just having hard time keeping up.  Nope.  To be warm in February, you need a heater that works.  Can anyone say Cha-Ching?

Another problem we found (not so much we, but, the kids that came over and were bitten by the pool more than once) was the calcium build up all over pool and hot tub.  The scales were really rough and if you hit the sides of the pool with your skin, it roughed it up.  Not a mangled rough, more like a skinned knee on cement or a really bad rug burn.  Many a fun day of swimming ended with me putting bandaids on the injured.  I started handing bandaids out like candy at Halloween when anyone came over to swim.  After years of neglect and no chemicals put in the pool, it took a toll.

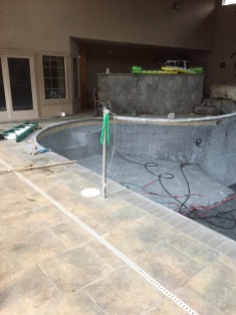
So, it was time get that all taken care of.  The pool was drained.  You can see the scaling and just how bad it was after all the water was removed.

The white stuff on the sides of the pool is the rough scale.  You can see how much of the pool was covered.  After it was drained, the work begins to remove the scaling.  Lots of careful sanding and acid to elimate the rough areas.

And let’s not forget the hot tub.  The hot tub wasn’t as bad, but, still had scale at the water level.

It really didn’t take that long once acids were applied.  But, I wasn’t doing the work, so, it probably took much longer than he wanted.  At the same time, the pool company moved the auto filler and leveled so that it stops when the pool has hit the right height.  We also had the drains changed out to newer designs.

We then had to fill it back in with water, which was pretty costly and not an easy task.  This took awhile to fill; but it eventually filled and we were able to swim in it once again before summer.  I took a few of the artificial plants out and added live plants and rubber mulch around the hot tub.  I plan to remove the larger artificial plants at the back of the pool and would love to add some metal art I saw in Cabo.  Something like this…

img_2010.png

I just love that look.  It would give the pool area a spa/retreat like look.

Anyway, the finished product looks much better and feels much better too!imageimage

imageimage

This took a few months from start to finish and well worth it!  On to the next project!